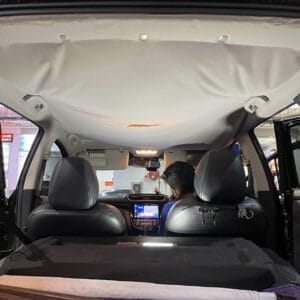
Is your car’s roof lining sagging, loose, or falling down? At The Regency Leather Singapore, we provide professional roof lining refurbishment and car roof lining repair for many car models. Our process focuses on proper removal of old foam and adhesive before installing new roof lining material for a clean, firm, and long-lasting finish suitable for Singapore’s hot and humid climate. Here’s how the process works:
Roof Lining Refurbishment Step 1: Remove the Roof Lining Board
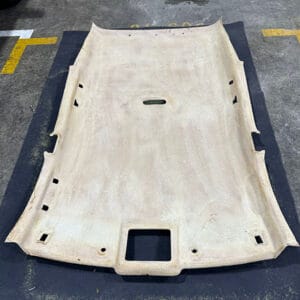
We carefully remove the necessary interior trim panels before taking out the roof lining board. This step must be done with care to avoid damaging clips, trims, lights, handles, and other interior components.
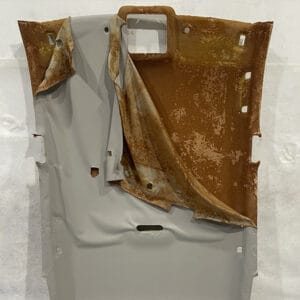
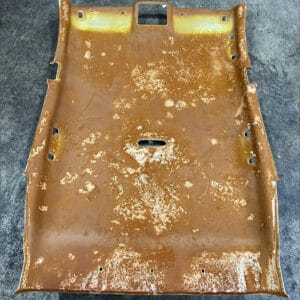
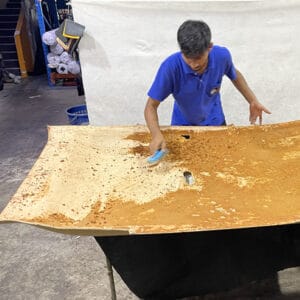
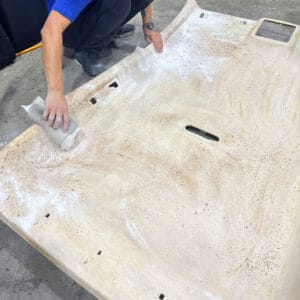
Roof Lining Refurbishment Step 2: Remove Old Fabric, Foam, and Adhesive
Removing old or detached roof lining fabric is usually straightforward, but cleaning the melted foam and old glue from the roof board requires careful workmanship.
Old melted foam and adhesive can form a stubborn layer on the roof board. If this residue is not properly removed, the new adhesive may not bond well with the new roof lining fabric.
This is one of the most important parts of the refurbishment process. The surface must be properly cleaned, dry, and free from loose residue before new adhesive and fabric are applied. Proper preparation helps prevent the roof lining from sagging again too quickly.
Roof Lining Refurbishment Step 3: Apply Suitable Adhesive for Singapore’s Climate
Choosing the right adhesive is important for a durable roof lining refurbishment. The adhesive should have strong bonding strength and be suitable for Singapore’s hot and humid weather.
A good adhesive should be able to withstand heat, humidity, and temperature changes inside the vehicle. It should also allow enough working time during installation so the roof lining fabric can be positioned neatly before it bonds firmly.
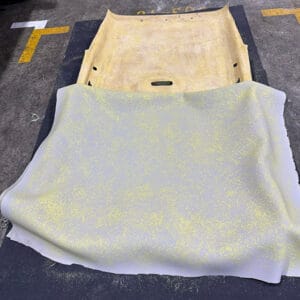
Roof Lining Refurbishment Step 4: Install the New Roof Lining Fabric
The new roof lining fabric is installed carefully onto the prepared roof board. Adhesive is applied evenly to help the fabric bond properly across the entire surface.
The fabric is fitted from the centre towards the sides, following the shape and curves of the roof board. Extra attention is given to corners, edges, curves, and openings to reduce the risk of air bubbles, wrinkles, or loose areas.
We use quality roof lining material with suitable foam backing to create a clean and comfortable interior finish.
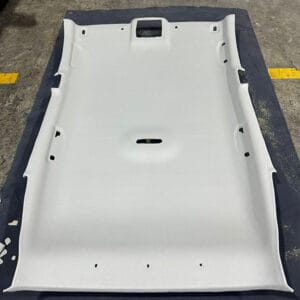
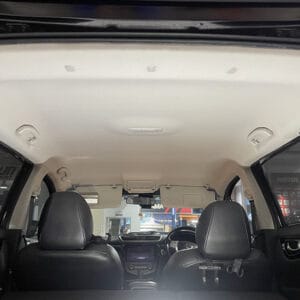
Roof Lining Refurbishment Step 5: Reinstall and Inspect the Roof Lining Board
Once the new roof lining material has been installed and the adhesive has set properly, the roof lining board is carefully reinstalled into the vehicle.
After installation, we check the roof lining surface, edges, trims, and overall fitment to make sure the finish is clean, firm, and neatly aligned with the car interior.