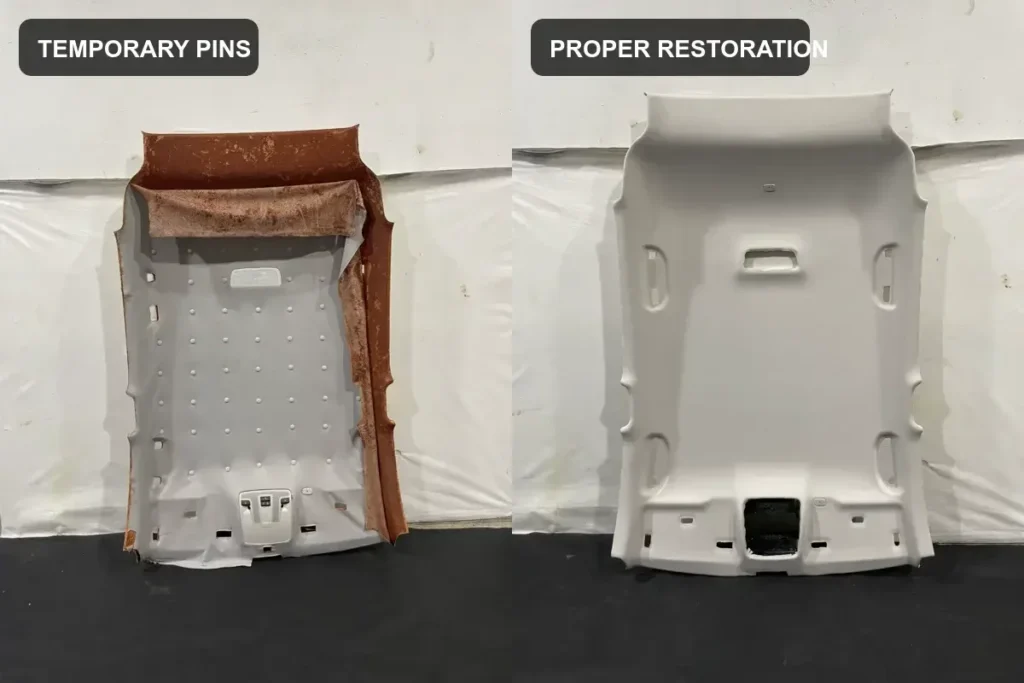
Plastic fixing pins can hold loose headliner fabric up for a short time, but they do not repair the failed foam and adhesive beneath it. When a car roof lining (headliner) starts sagging because its foam backing has deteriorated, the failure is usually progressive across the affected panel. Adding more pins treats only the visible symptom.
This real workshop case shows what happened after a roof lining was covered with plastic pins—and what was required to restore it properly.
Why does a car roof lining (headliner) sag?
A typical upholstered headliner is a layered system:
- A shaped roof-lining board provides the structure.
- A thin foam layer gives the surface its soft, even appearance.
- The visible fabric is bonded over that foam.
As the vehicle ages, heat, humidity and repeated temperature cycles can weaken the foam and bonding system. The foam may turn brown, brittle or powdery. Water ingress can also worsen the condition and must be checked separately. Once the fabric is no longer bonded to a sound foam layer, gravity pulls it down and the sagging gradually spreads.
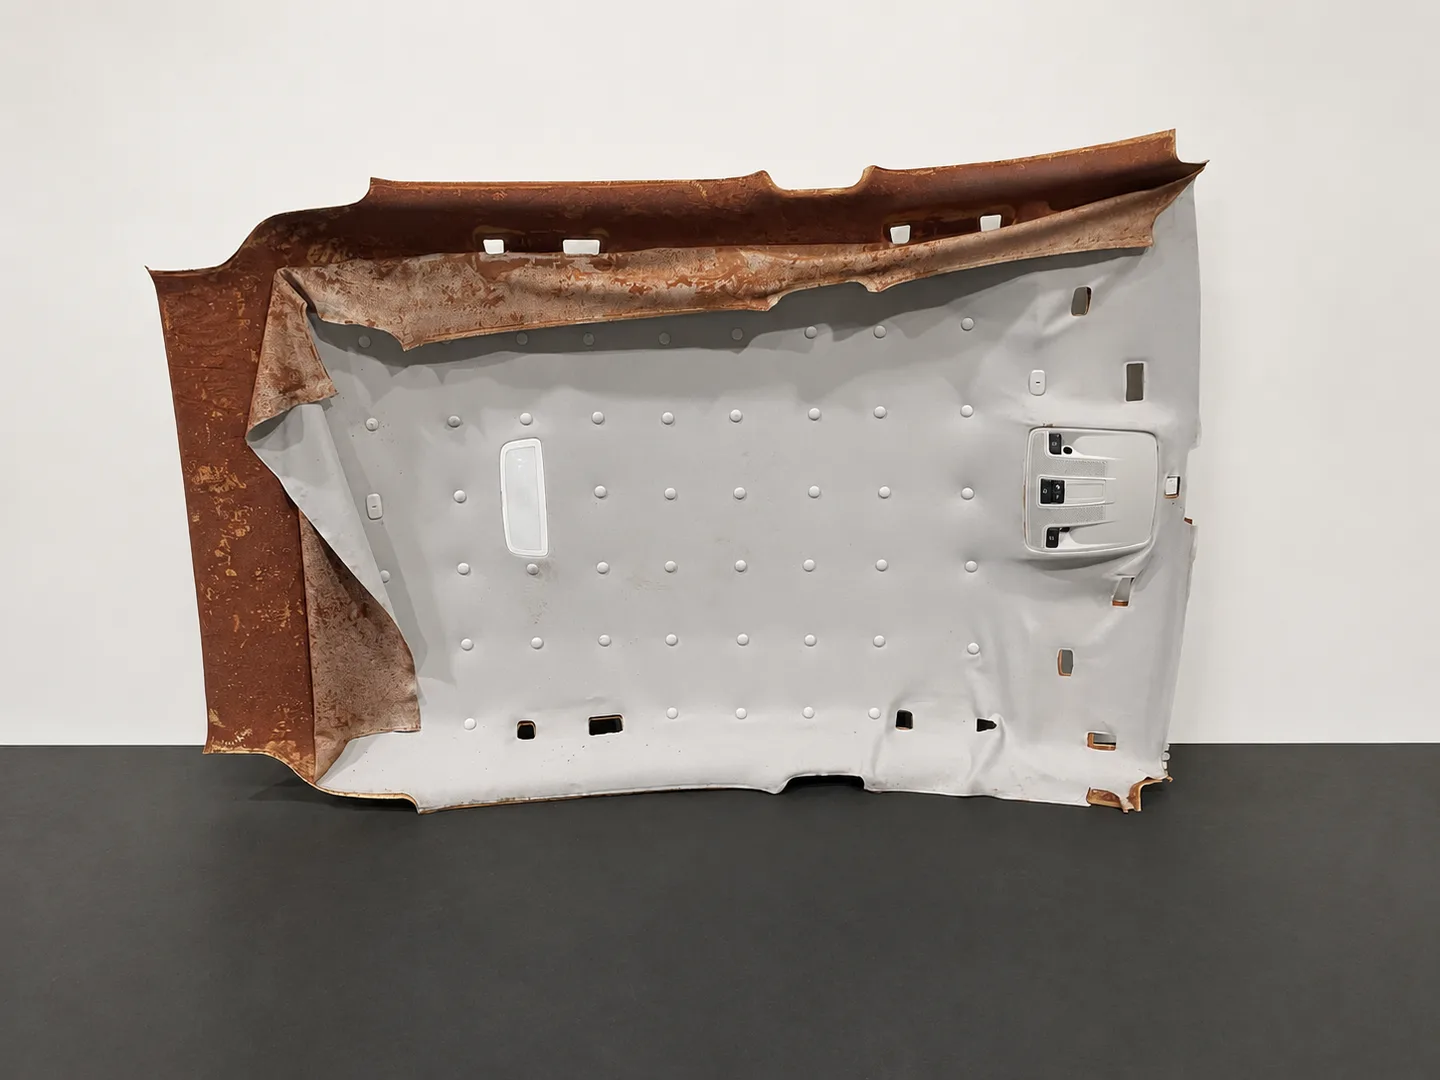
The image above is an explanatory illustration. It shows the deteriorated layer beneath a pin-covered headliner; it is not presented as an original workshop photograph.
Why do plastic headliner pins fail to solve the problem?
Each pin supports only one small point. It cannot renew the degraded foam, remove loose residue or recreate an even adhesive bond across the headliner board.
- The failed layer remains in place. The old foam continues breaking down between the pins.
- Sagging can spread. New loose areas appear, leading owners to add even more pins.
- The finish becomes uneven. Dozens of visible plastic caps make the roof look improvised rather than restored.
- The original fabric is punctured. Every pin leaves another hole and may stretch the weakened cloth around it.
- Time and money are spent twice. The temporary purchase and installation do not remove the need for proper repair later.
What is the headliner board made from—and can too many pins damage it?
The headliner backing board is not a solid metal panel. Depending on the vehicle and manufacturing system, it may be a lightweight moulded composite made from polypropylene and foam, polyurethane reinforced with glass fibre, pressed or reclaimed fibre, natural-fibre and polypropylene material, or another layered thermoplastic composite. These materials are shaped to provide the required contour and stiffness while keeping weight low. Automotive-industry references document polypropylene-and-foam sandwich headliners as well as glass-fibre, polyurethane and natural-fibre headliner systems.
A few holes do not automatically destroy every headliner board, but dozens of closely spaced pins create many perforations and local stress points. This is especially concerning when the board is already aged, dry or brittle, is thin around openings, or has been weakened during repeated removal and installation. Individual holes may enlarge, nearby holes may join into a tear or crack, and the board can lose stiffness or split along a perforated line.
In the worst case, the complete headliner board can become too damaged to reuse properly. It may then require a model-specific replacement instead of a normal fabric refurbishment. Depending on the vehicle brand and model, sunroof configuration, part availability, freight and installation labour, a complete replacement can potentially cost around S$1,000–S$2,000 or more. This is an indicative risk—not a fixed quotation. A shortcut chosen to save money can therefore turn into a much larger repair bill.
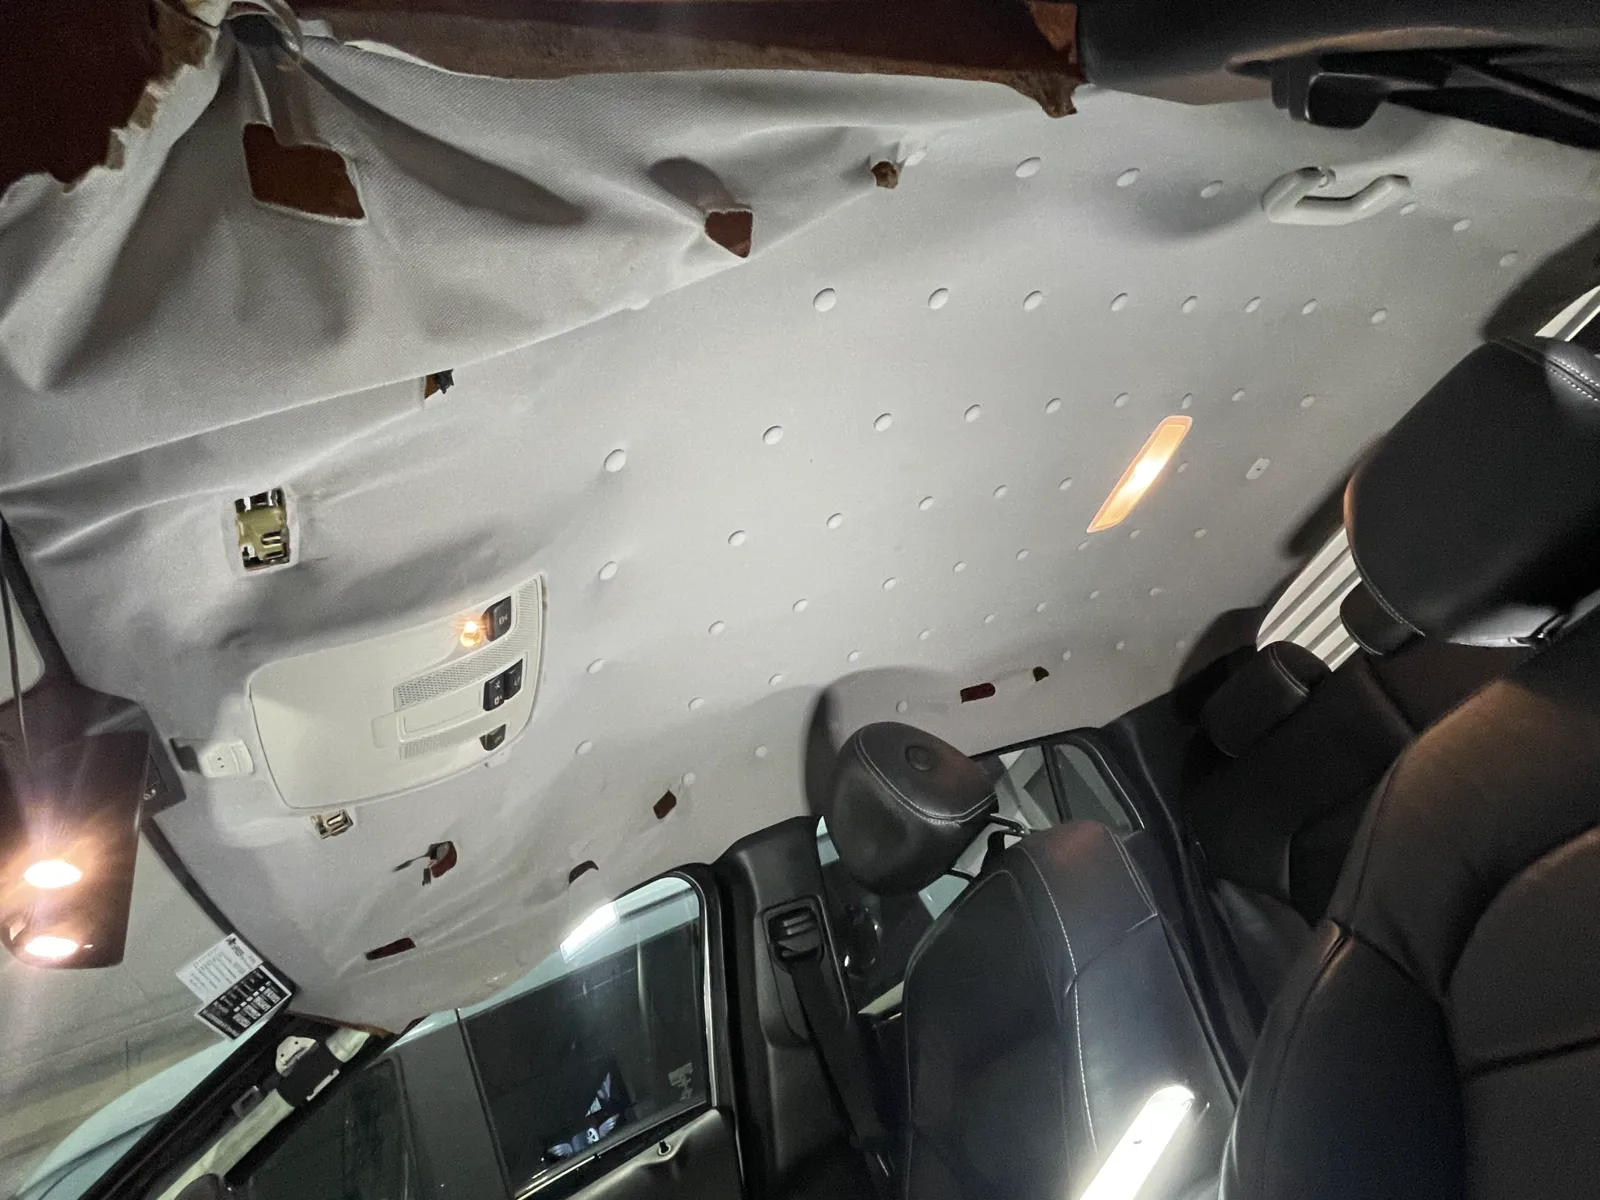
Actual workshop photograph: the loose roof fabric had been held up with many plastic pins, yet the underlying failure remained.
Why is age-related sagging usually a whole-panel problem?
The visible sag may begin in one corner, near a light or above a passenger seat, but the foam was manufactured and aged across the same panel. If it has started crumbling in one area, nearby sections are often already losing strength even if they have not dropped yet.
That is why spot-gluing one loose patch, injecting adhesive through the cloth or adding pins from place to place often produces only a short-lived or uneven result. A genuinely isolated problem—such as a local water leak or physical damage—should still be inspected, but widespread age-related foam failure needs the affected roof-lining panel treated as a complete system.
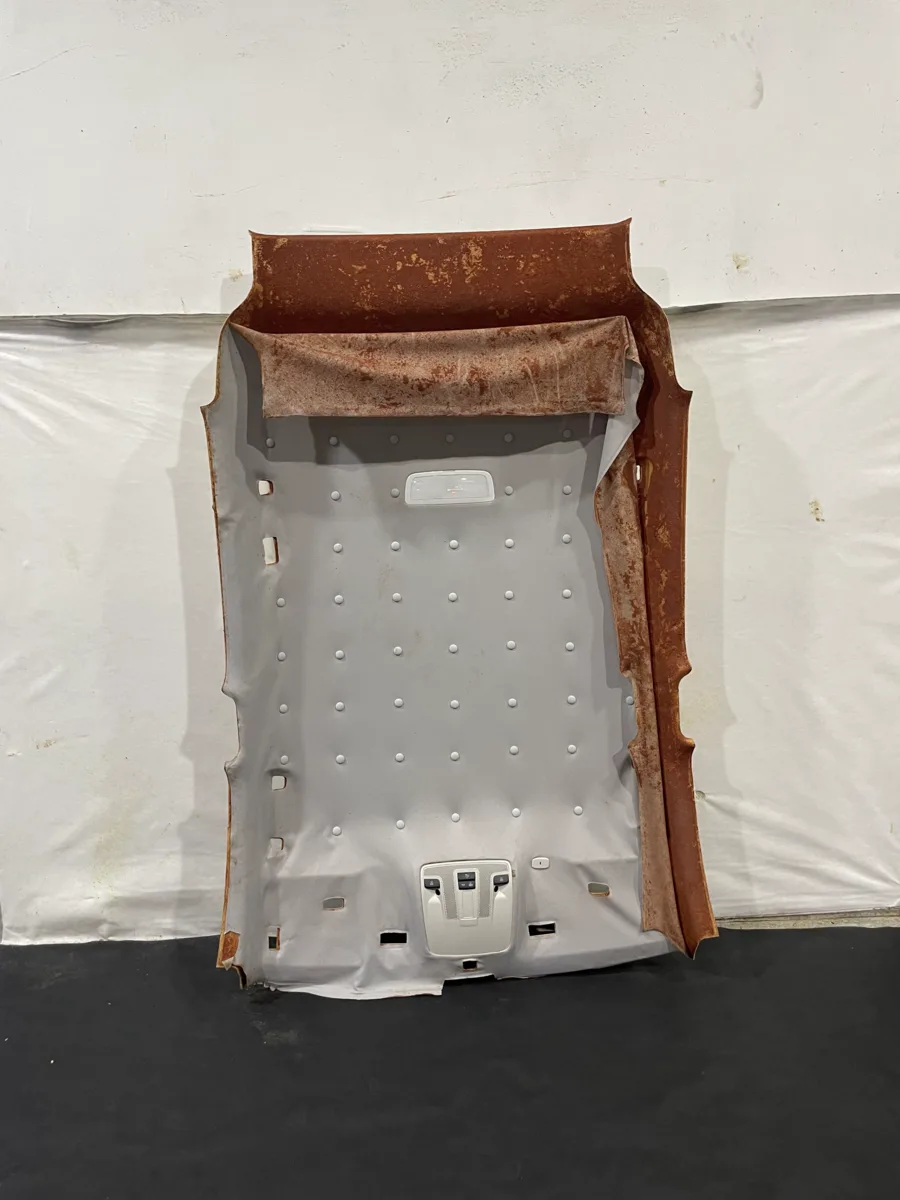
Actual workshop photograph after removal: the brown, deteriorated foam and the many fixing points make the full extent of the failure visible.
What is the correct way to repair a sagging roof lining?
A lasting repair requires access to the complete headliner board and proper surface preparation:
- Inspect the vehicle. Confirm the roof configuration, sunroof components, trim condition and any sign of water ingress.
- Remove the relevant interior fittings. Depending on the model, this can include handles, lights, visors, pillar trims and other components securing the board.
- Remove the headliner board carefully. The shaped board must not be folded, cracked or damaged during removal.
- Strip away the old fabric and failed foam. Loose, powdery residue cannot provide a reliable base for new material.
- Clean and prepare every part of the complete surface thoroughly. All powdery foam, loose fibres, old adhesive and non-bonding residue must be removed—not merely brushed over until the board looks cleaner. New adhesive can bond properly only when it makes direct contact with a clean, dry and stable substrate. If old foam dust or weak adhesive residue remains, the new glue bonds to that unstable contamination instead of the solid headliner board. This can create weak spots, uneven adhesion, bubbles, lifted edges and premature sagging again even when good replacement fabric and adhesive are used.
- Apply suitable adhesive evenly and install new automotive roof-lining material. The openings, contours and edges are wrapped and finished correctly.
- Reinstall and inspect. The board and removed components are refitted, aligned and checked before delivery.
Thorough surface preparation is therefore one of the most important parts of the entire repair. The quality of the finished bond depends not only on the new material and adhesive, but also on what remains underneath them. Covering contaminated areas with more glue does not strengthen the old layer; it traps the original failure beneath the new fabric.
Automotive headliner adhesives are specifically formulated for this application and for an even bond between compatible fabrics, foam and trim surfaces. For example, 3M’s official headliner adhesive information describes resistance to heat, humidity and other vehicle-interior conditions.
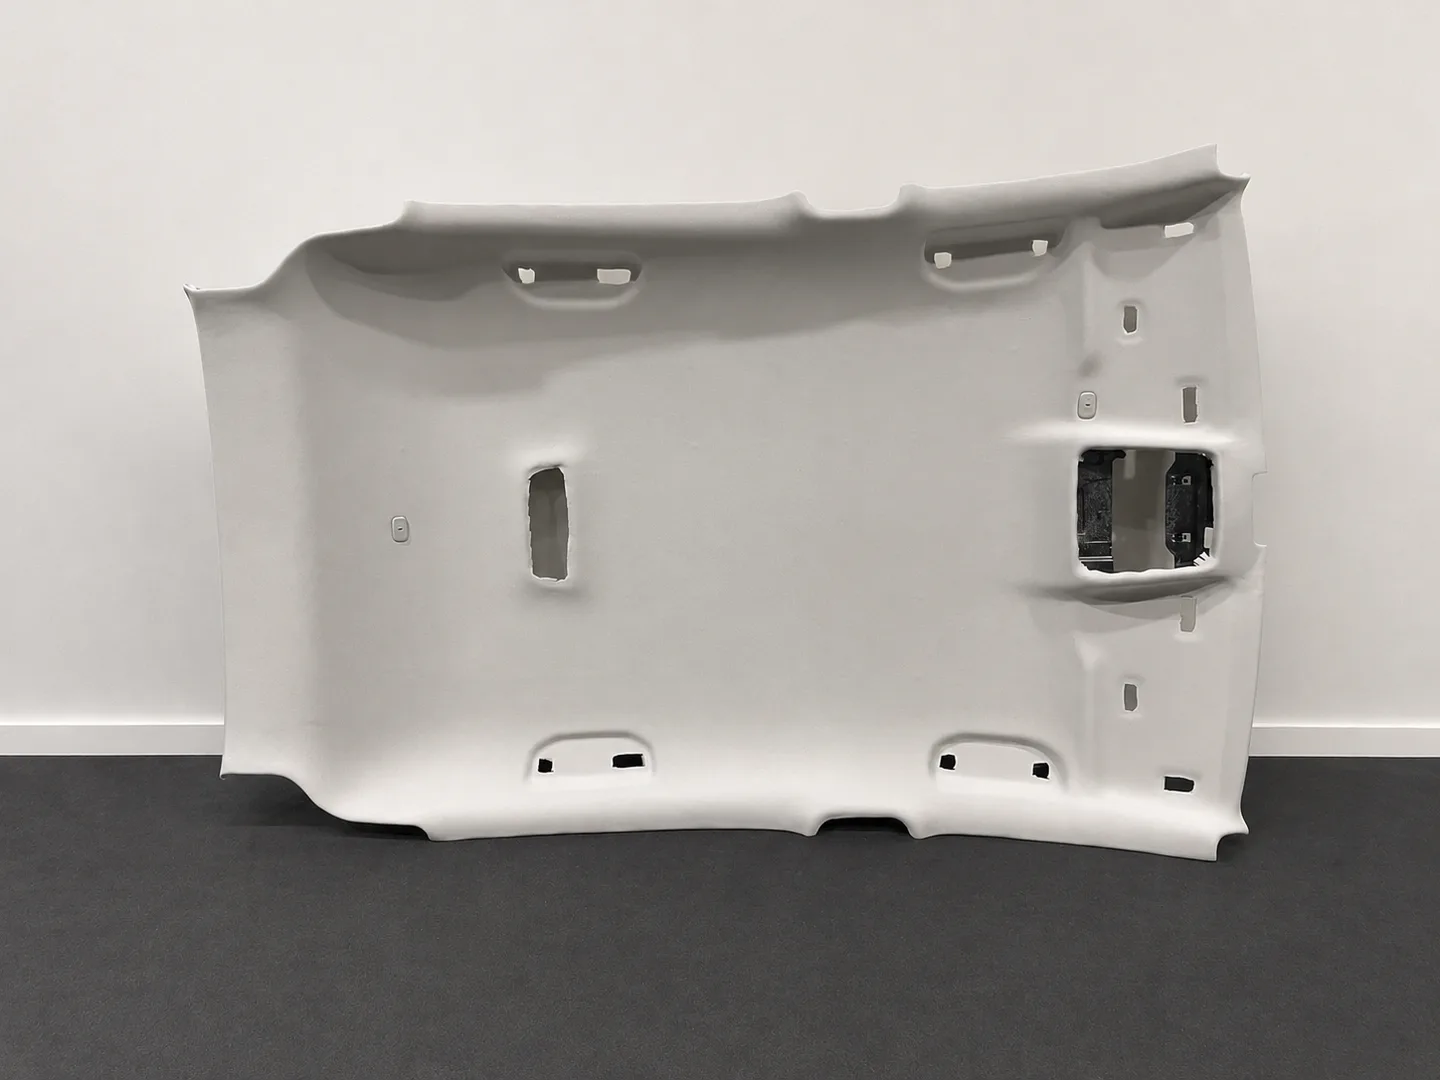
The image above is an explanatory illustration of the finished roof-lining board after complete surface preparation and re-covering.
The result after complete roof lining (headliner) restoration
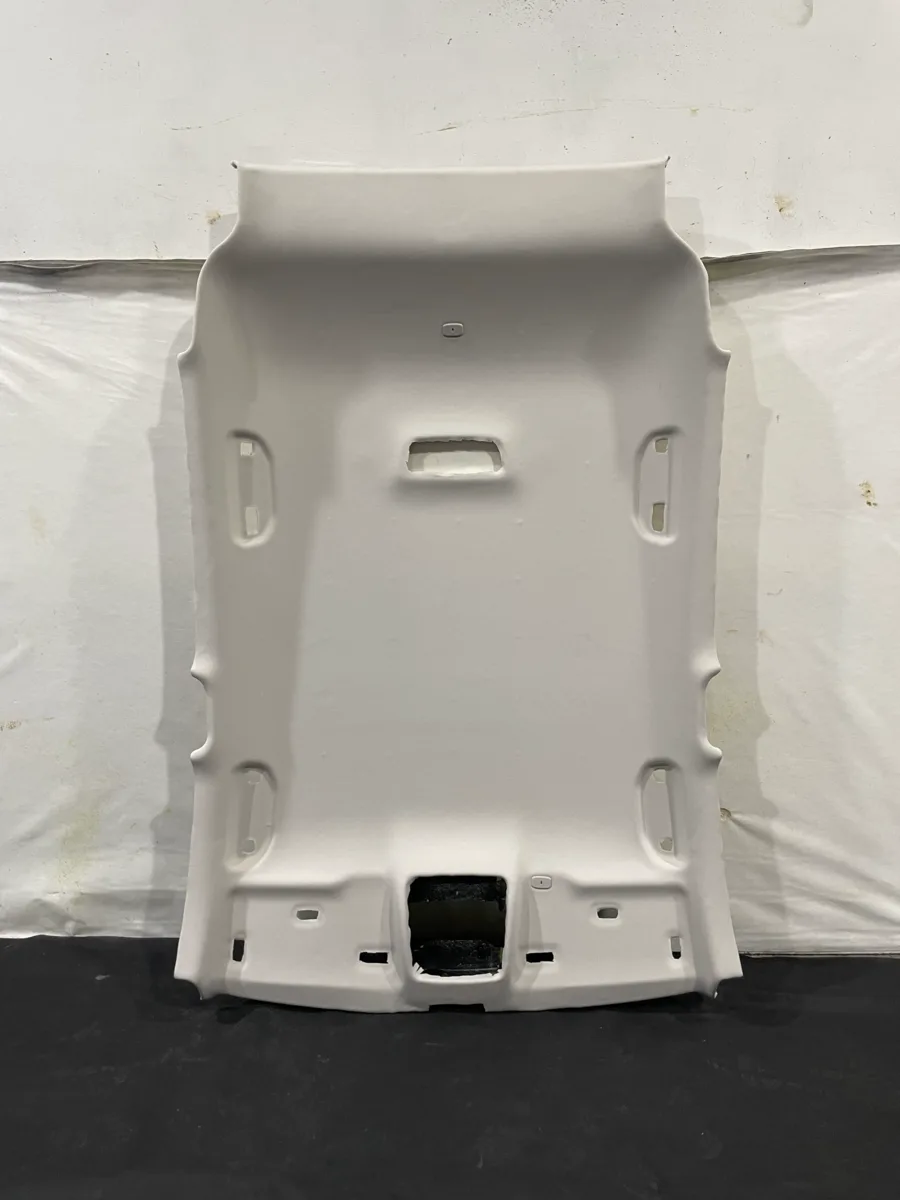
Actual workshop photograph: the complete headliner board after the failed foam and old fabric were removed and new material was installed.
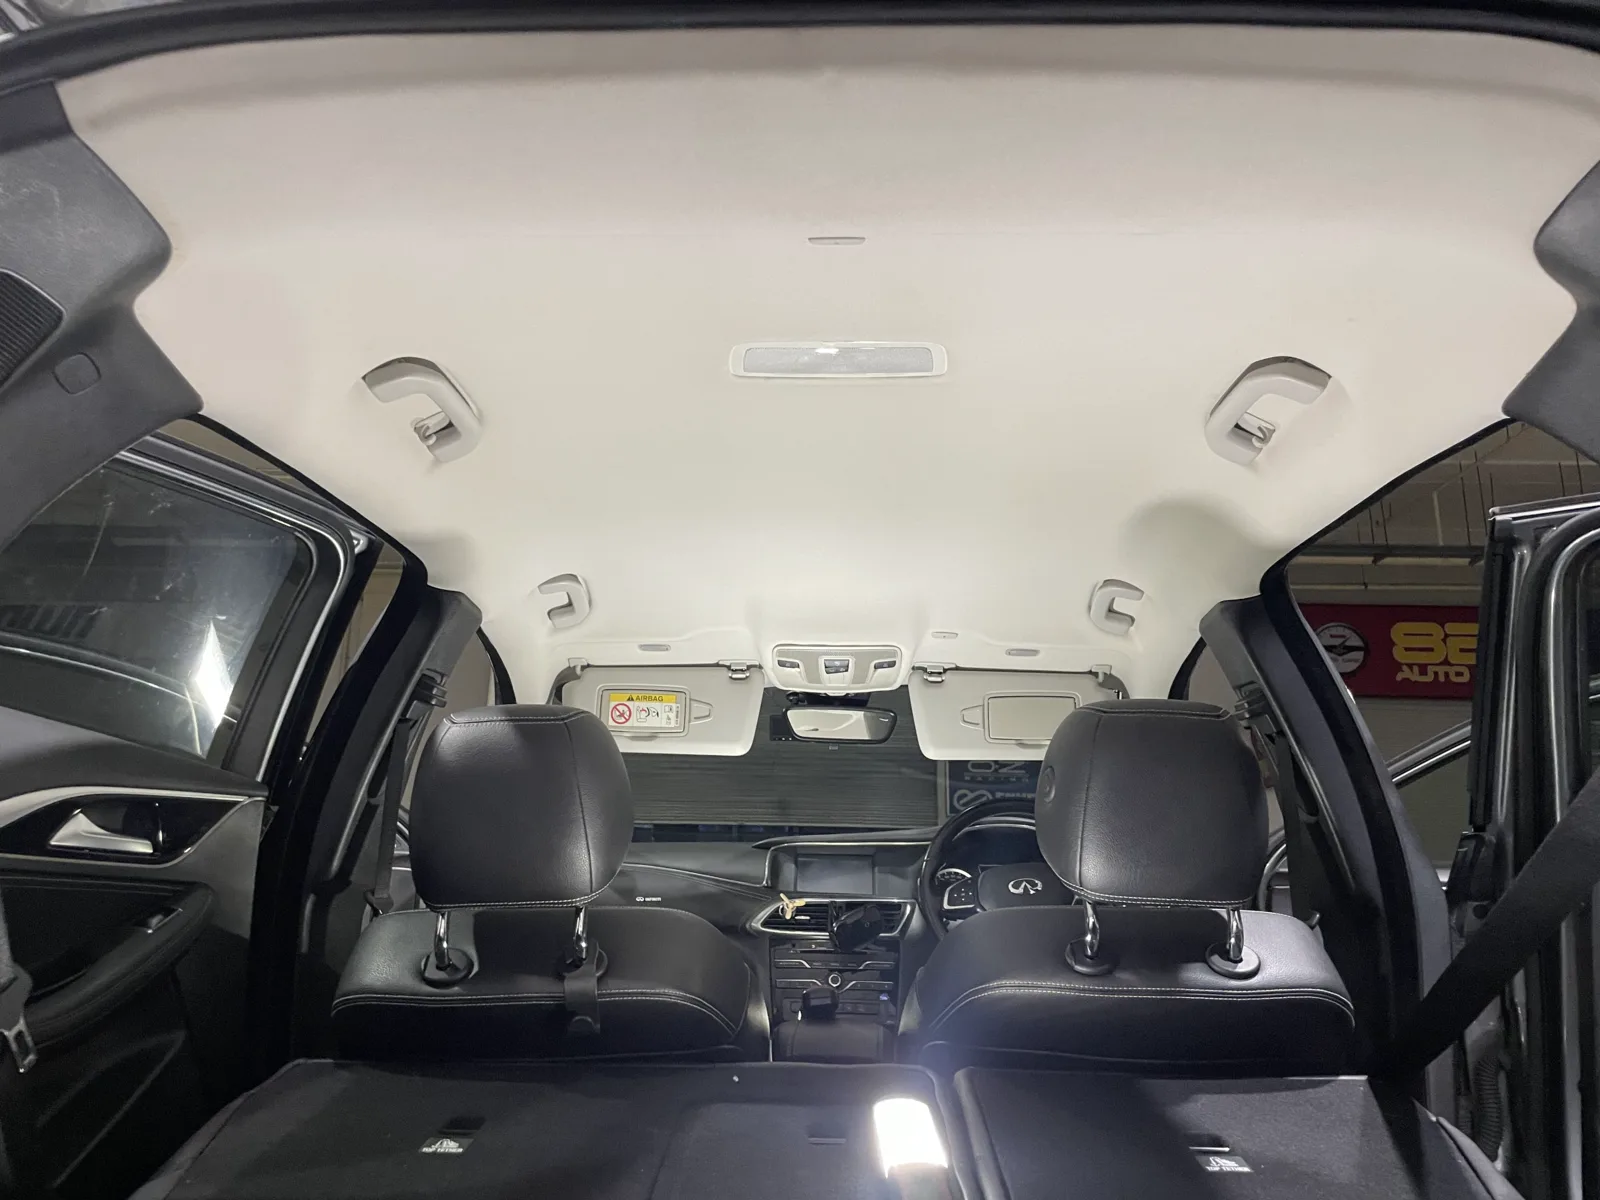
Actual workshop photograph after reinstallation: the roof surface is clean, even and free from plastic fixing pins.
This case did not need more pins. It needed the failed layers removed, the board properly prepared and the full surface re-covered. That is the difference between temporarily holding sagging cloth in place and repairing the roof lining system.
Frequently asked questions
Can I glue the sagging fabric back without removing the headliner?
If the foam has already become powdery, glue applied onto the old residue is bonding to a failed layer rather than a sound surface. It may also create hard patches, stains or an uneven appearance. Proper preparation normally requires removing the affected board.
Can the original headliner fabric be reused?
Once the original foam backing has deteriorated and separated, reusing the old cloth usually does not provide a clean or reliable finish. Replacement automotive roof-lining material is normally installed after the board is cleaned.
Are headliner pins useful at all?
They may keep loose cloth away from occupants temporarily while a repair is being arranged, but they should not be mistaken for a completed repair. They do not stop the surrounding foam from deteriorating.
Does every vehicle require the same repair process?
No. Removal and installation differ by vehicle design, roof size, pillar layout, accessories and whether the car has a sunroof. The vehicle should be inspected before the work is confirmed.
Need a proper roof lining repair in Singapore?
The Regency Leather provides complete car roof lining (headliner) repair and replacement, including standard roof fabric, Alcantara and Nappa leather options, pillar and sun-visor reupholstery, sunroof blind work and complete interior roof colour changes.
Our roof lining workmanship carries a three-year limited warranty against detachment caused by materials supplied by us, adhesive bonding or workmanship. It does not cover owner-caused damage, stains, water ingress, wetting or failure of original vehicle fasteners and components.
WhatsApp: +65 9671 4031
中文 WhatsApp: +65 8123 3398
View our Car Roof Lining (Headliner) Repair service and completed vehicle cases.